Installation of Windows Cluster is always a challenging task. Most of the time, we didn’t get enough opportunities to install an entire cluster system on our own due to limitation of hardware/software. With the help of desktop virtualization software, now its possible to build a windows cluster on a desktop environment. The purpose of this series is to create a step-by-step deployment guide on how to build a windows Cluster and install SQL Server 2008 on it. This series is created for learning and testing purpose.
Software Used to Create the SQL Server 2008 R2 Cluster:
For the virtual environment to create the windows cluster on a client OS, we are going to use Oracle VM. Oracle VM is a free desktop virtualization software available for both 32-bit as well as 64-bit platform which support 64-bit guest operating system. If you are new to Oracle VM and don’t know how to create a VM using it, you can have a look on the following article. The above article was developed using VMLite, however the same steps are applicable for Oracle VM as well. We are going to use the evaluation edition of Windows Server 2008 & SQL Server 2008 R2 to build the cluster, you can download the same from the MS website. For the storage requirement, we are going to use FreeNAS, a free storage solution to build our cluster. You can download all these software from the links provided above.
Before, we start the actual installation, let’s have a quick look on our existing virtualization environment. To build a Windows Cluster, we need a Domain Controller (DC) present in our network along with a DNS server, which will help us for Name resolution. For this series, we build a domain named DemoLab.Local. So we are going to create a DC named BLRDC01, which will be also used for DNS Name resolution. Then we are going to build a storage server in our environment using FreeNAS, and provided the disks to the cluster nodes. Next, we are going to build a two-node Windows Cluster using Windows Server 2008.
For this series of post, I am using the IP Address series 172.16.10.x/255.255.0.0 for our Public LAN. Before building the windows cluster, we will add the Backup LAN & Heartbeat LAN on our Windows Cluster Node. I have already build three virtual machines, installed Windows server 2008 evaluation on it and promoted one of them to a domain controller with AD-integrated DNS . The machine name and initial configuration as follows:
| VM Name | Operating System | Functionality | Public LAN IP |
| BLRDC01 | Windows 2008 Eval | DC, DNS | 172.16.10.1/255.255.0.0 |
| BLRC100 | Windows 2008 Eval | Cluster Node 1 | 172.16.10.100/255.255.0.0 |
| BLRC101 | Windows 2008 Eval | Cluster Node 2 | 172.16.10.101/255.255.0.0 |
After we configured all these three machines, we will add both the servers to the DemoLab.Local network. Now that we have added both the servers to the DemoLab network, we are going to install the storage server.
Installing the Storage Server:
Create a new virtual machine using VMLite as a storage server. While you are asked to choose the type of OS and version, select BSD as Operating System and version as FreeBSD. Our storage server is based on FreeBSD. For this demo environment, I have given 400MB of RAM of our storage server. We are booting up the new VM using FreeNAS. You will get the following screen, during boot up: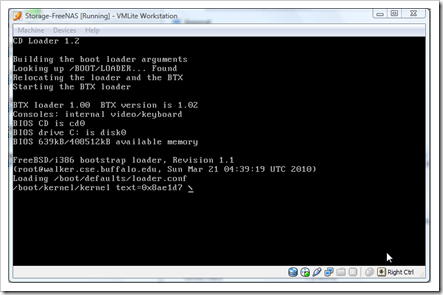
Once the storage server booted up, you will get the following screen. Currently, I am using the Live CD of FreeNAS, which will let me to use storage server without loading the entire OS, however, we are going to install it, so that it can boot up from the Server hard disk. 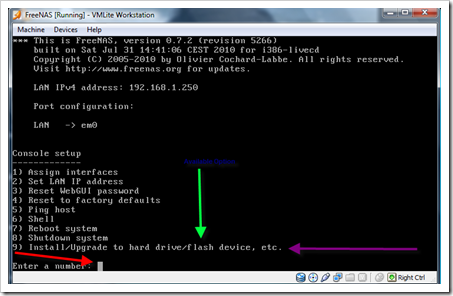
As we can see, from the above screenshot, there are 9 available options, while we booted from the FreeNAS Live CD. We need to choose the option 9, to start the installation, and load the OS to the hard disk. You will get the following screen after you press 9 on the previous menu. 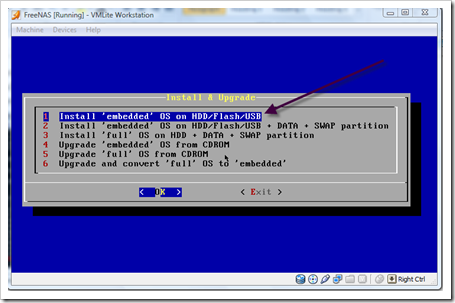
Select the third option to install the Full OS, and click on OK. You will get the following screen. Click on OK to continue.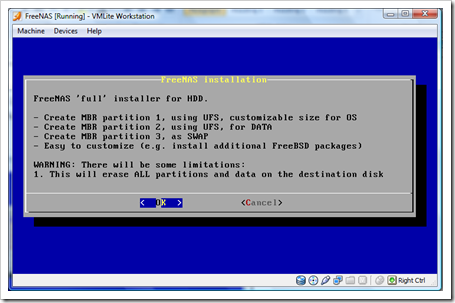
Select your Current installation media, for this installation, we are using a CD-ROM to mount the FreeNAS OS. Click on OK to continue.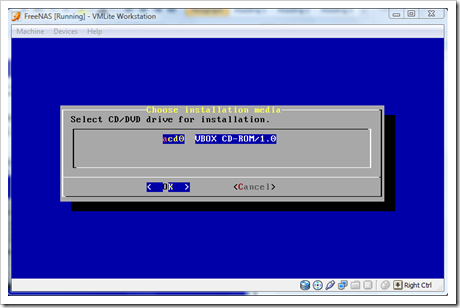
Select the destination drive, where you want to install FreeNAS, then click on Ok to continue.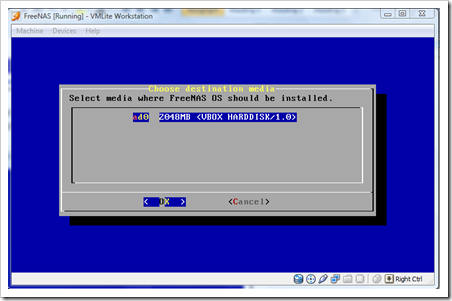
Enter the size of the OS partition, for this demo, I have given 700MB. Click on Ok to continue.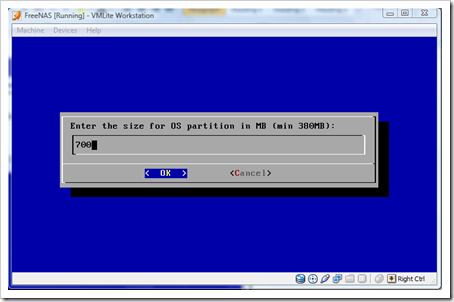
Add a swap partition to the existing storage server, click on Yes to continue.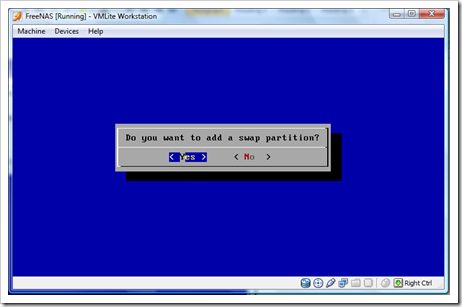
The size of swap is should be double the size of the physical RAM present in the server, for our installation, we set it to 800 MB. Click on OK to continue.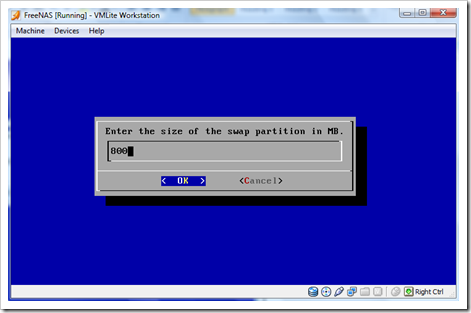
Once we set all the configuration, the installation of FreeNAS will continue. 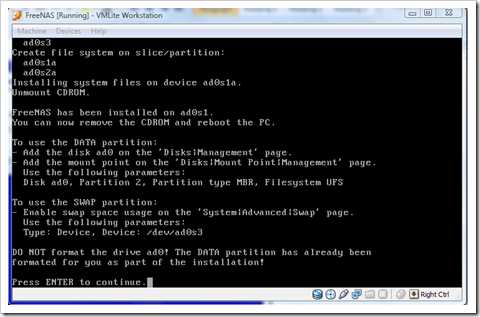
Click on Enter to complete the installation, and you will be back to the starting screen of FreeNAS installation. Click on the Exit tab to complete the installation.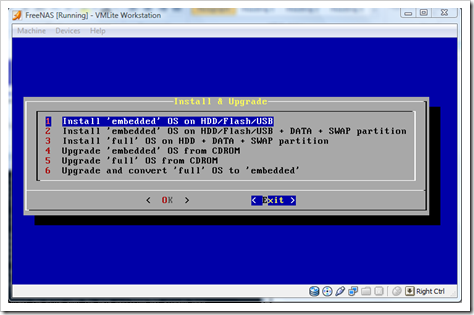
Since the installation of FreeNAS is completed, we need to set the IP Address for this server, and set the WebUI to access the server.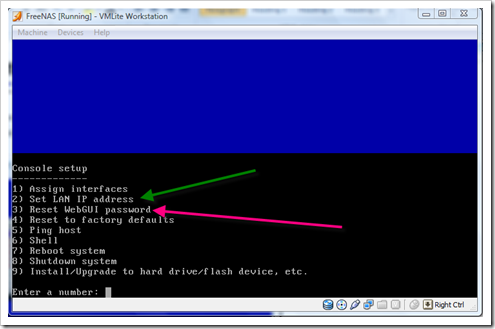
Select 2 to set an IP Address for the server. For our environment, we are going to configure the Static IP Address, Subnet Mask, Default Gateway, and DNS server for our storage server. Click on Next and provide all the information. Once you have configured all the information, you will get the following screen.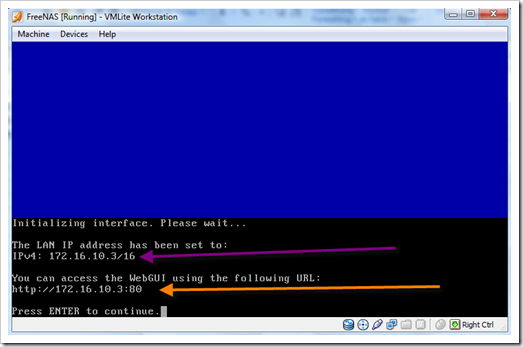
Thus, the initial configuration of our storage server is completed. Remove the iso image from the machine and restart the server. Once the server is restarted, you can access the storage server using a web-browser. 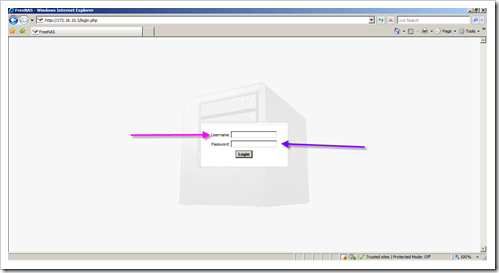
When you connect through the above URL, you will get the above screen. The initial username and password are admin & freenas respectively. In the next part of this series, we will see how to configure the storage server for the cluster deployment.

Pingback: Building a SQL Server 2008 R2 Cluster: Part II | SQL…. Still Learning
Pingback: Building a SQL Server 2008 R2 Cluster: Part VIII | SQL…. Still Learning
Greeting Sudeepta,
I’ve been reading your series on building a SQL cluster on VirtualBox. I’m thinking about giving it a try, I’m wondering if you’ve had any updates since the series was written? After building the cluster, is there anything you would have done differently? What hardware platform did you use for your testing?
Thanks,
Kevin
Hello Kevin,
You can use VirtualBox to build a SQL Cluster, if you are using Windows Server 2008 R2, then you can use it as a storage server as well (so you don’t have to use FreeNAS). You can use the iSCSI Target Initiator for storage server. Virtualbox supports 64-bit guest OS, and available as a free download. I started the series with a 4GB, quad-core machine, but later I upgraded it to a 6GB. Although I did some modification in the cluster checks, but after upgrading the RAM, all the checks were through. So for learning purpose, you may want to skip some checks, but Never for Production.
Hope, this may help.
when i am using FreeNas for doing all the clustering part when i shutdown my system all configuration and all the setup was gone i tried hibernate also so please can u give any idea for resolve this issue
Send a reply to your email id, plz check.
Hi Sudeepta ,
it’s nice aritcle………
keep posting on some real time scenairos.
Advance Thanks
Raj………………
Pingback: Setup LAB: 04 Setting up a Storage Server | SQL…. Still Learning